こんにちは、 @kz_morita です。
今回は、Kotlin で Server サイドのコードを書く時に、multi project の構成にして、レイヤーどアーキテクチャを表現するのが良さそうだったので IntelliJ と gradle で環境を構築するところまでご紹介したいと思います。
プロジェクトの準備
まずは、プロジェクトを作成します。IntelliJ を起動し Create New Project を選択します。

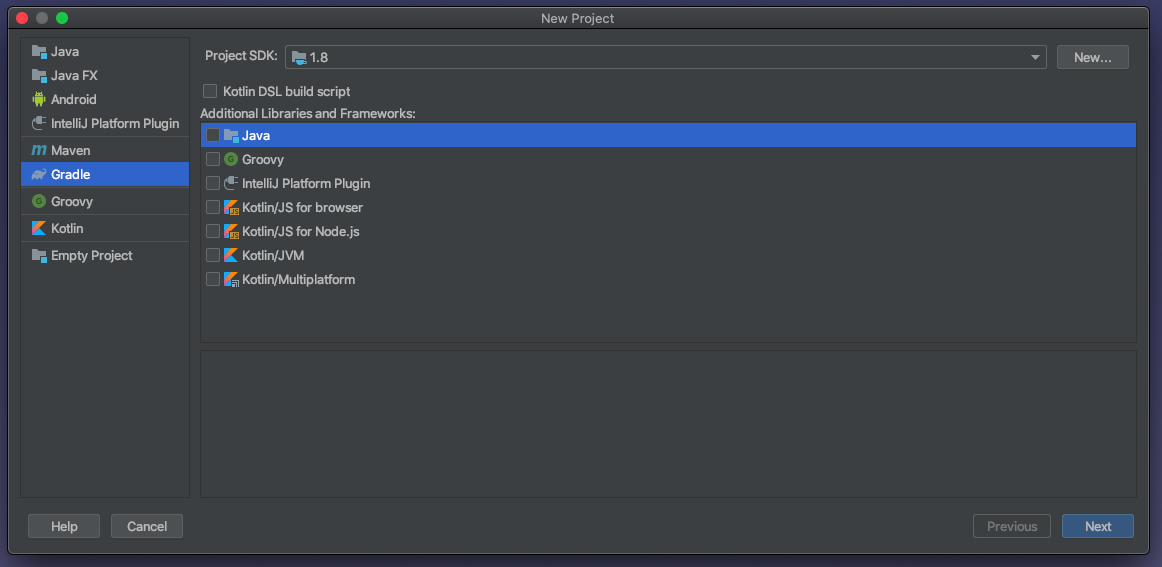
そしたら次に、Gradle プロジェクトを作成するので、左のリストから Gradle を選択します。 Additional Libraries and Frameworkds のチェックボックスは全て外した状態にします。
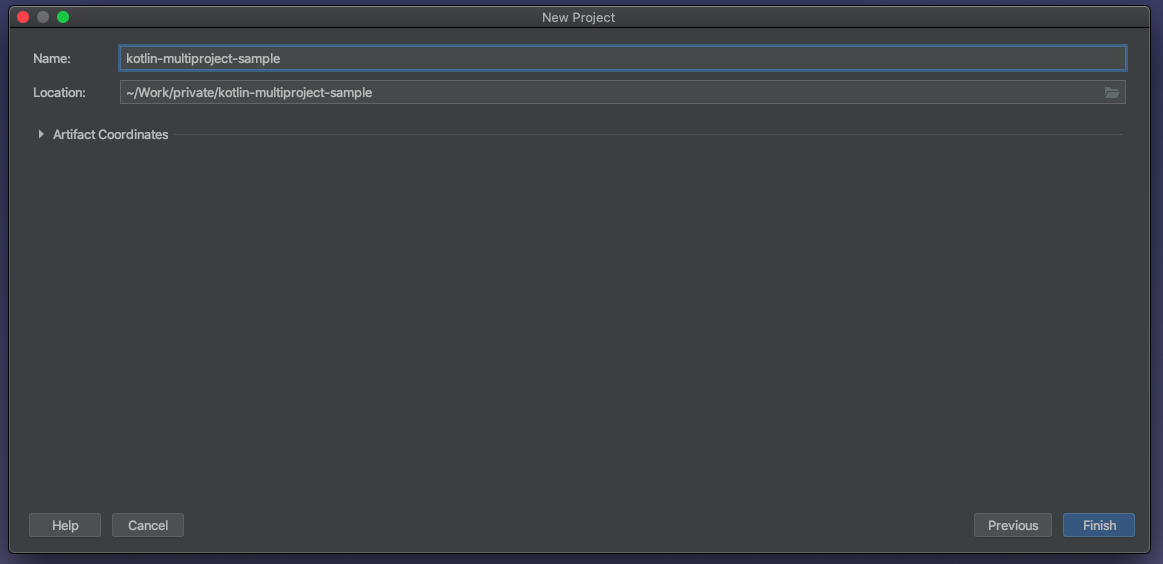
最後にプロジェクト名を適当に入れます。ここでは、kotlin-multiproject-sample としました。
プロジェクトが作成されると以下のような構成になるかと思います。

build.gradle を書く
以下のような gradle ファイルを書きます。
buildscript {
    repositories {
        mavenCentral()
        jcenter()
    }
}

plugins {
    id "org.jetbrains.kotlin.jvm" version "1.3.30"
    id "com.github.johnrengelman.shadow" version "2.0.3"
}


allprojects {
    repositories {
        jcenter()
    }
}

configure(subprojects) {
    apply plugin: "idea"
    apply plugin: "kotlin"
    apply plugin: "com.github.johnrengelman.shadow"

    ext {
        applicationVendor = "foresta.me"
        applicationVersion = '1.0-SNAPSHOT'
    }

    group 'org.example'
    project.version '1.0-SNAPSHOT'


    compileKotlin {
        kotlinOptions.jvmTarget = "1.8"
    }
    compileTestKotlin {
        kotlinOptions.jvmTarget = "1.8"
    }

    tasks.withType(SourceTask).findAll { it.hasProperty("options") }*.options*.encoding = "UTF-8"

    sourceSets {
        main {
            resources {
                srcDirs "src/main/resources"
            }
        }
    }

    jar {
        manifest {
            attributes "Implementation-Vendor-Id": applicationVendor
            attributes "Implementation-Vendor": applicationVendor
            attributes "Implementation-Version": applicationVersion
            attributes "Implementation-Title": project.name
        }
    }

    test {
        useJUnitPlatform()
        testLogging {
            events 'passed', 'skipped', 'failed'
        }
    }

    task sourcesJar(type: Jar, dependsOn: classes) {
        classifier = "sources"
        from sourceSets.main.allSource
    }

    artifacts {
        archives sourcesJar
    }

    task mkdirs {
        doLast {
            [
                "src/main/kotlin",
                "src/main/resources",
                "src/test/kotlin",
                "src/test/resources"
            ].each {
                def path = "${projectDir}/${it}"
                ant.mkdir(dir: path)
                if (new File(path).listFiles().length == 0) {
                    ant.touch(file: "${path}/.gitkeep")
                }
            }
        }
    }

    repositories {
        mavenCentral()
        jcenter()
    }

    dependencies {
        testCompile("org.amshove.kluent:kluent:1.38") {
            exclude group: "org.jetbrains.kotlin", module: "kotlin-stdlib"
            exclude group: "org.jetbrains.kotlin", module: "kotlin-reflect"
        }
        testCompile "org.junit.jupiter:junit-jupiter-api:5.2.0"
        testRuntime "org.junit.jupiter:junit-jupiter-engine:5.2.0"
    }
}

task mkdirs {
    description "Mae dires"
    dependsOn subprojects*.tasks.mkdirs
}

wrapper {
    gradleVersion = '4.8.1'
}

project("sample-application") {
    dependencies {
        compile project(":sample-domain")
    }
}

project("sample-cli") {
    dependencies {
        compile project(":sample-application")
    }
    shadowJar {
        baseName = "sample-cli"
        version = applicationVersion
        manifest {
            attributes "Main-Class": "org.example.cli.Main"
        }
    }
}

project("sample-web") {
    dependencies {
        compile project(":sample-application")
    }
    shadowJar {
        baseName = "sample-web"
        version = applicationVersion
        manifest {
            attributes "Main-Class": "org.example.web.Main"
        }
    }
}

project("sample-domain") {
    dependencies {
        compile "org.jetbrains.kotlin:kotlin-stdlib-jdk8"
        compile "org.jetbrains.kotlin:kotlin-reflect"
        compile "org.jetbrains.kotlinx:kotlinx-coroutines-core:1.2.0"
    }
}

project("sample-infrastructure") {
    dependencies {
        compile project(":sample-domain")
    }
}
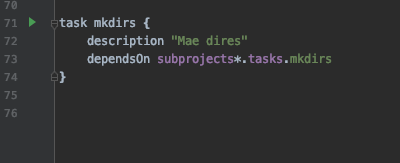
後述しますが、作成した submodule の中のディレクトリ構造を作成するための、mkdirs というタスクを用意しています。
Module を追加
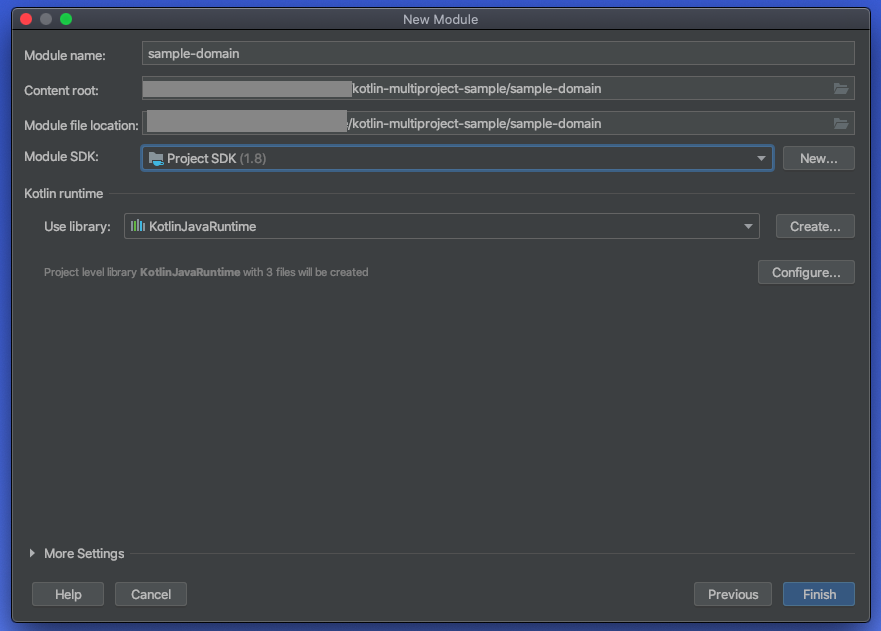
次に、submodule を作っていきます。プロジェクトのルートで右クリックして、Module を作成します。
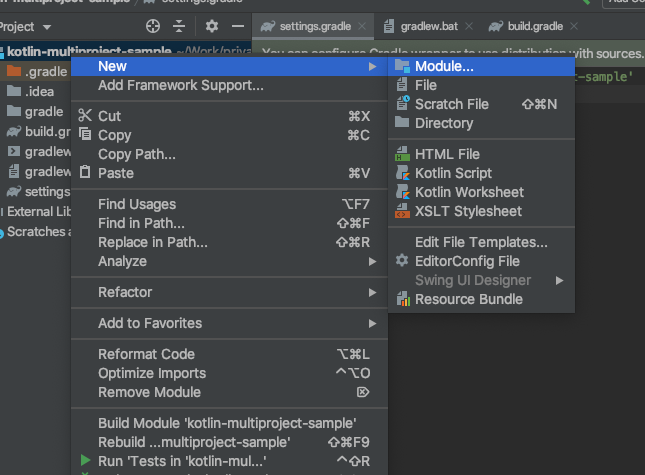
今回は、プロジェクトルートの gradle で全体を管理するため、submodule は gradle プロジェクトとしてではなく、普通の Kotlin のプロジェクトとして作成します。
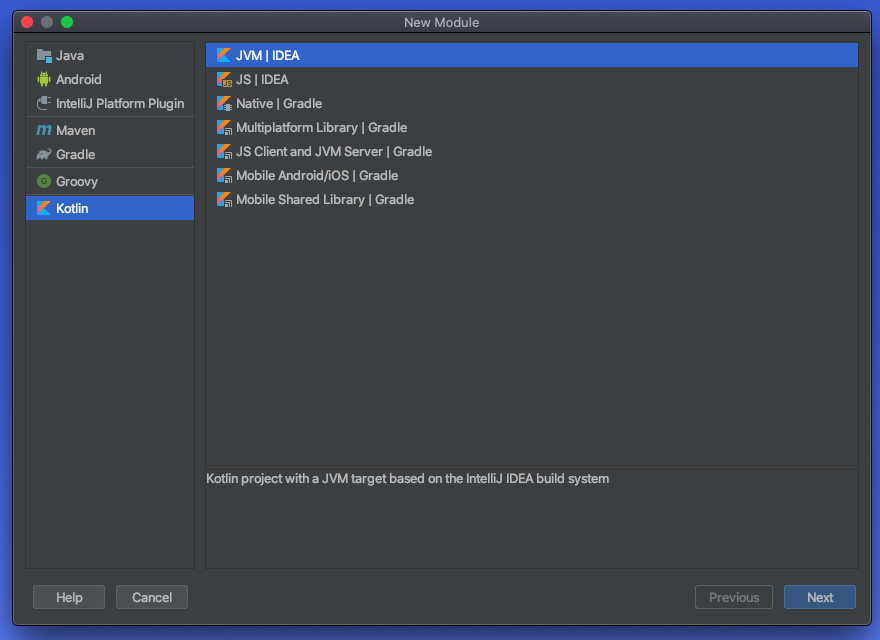
今回は、domain, application, infrastructure, presentation のいわゆる 4 層レイヤー構造にしていくので、sample-domain のような形で module を作成していきます。
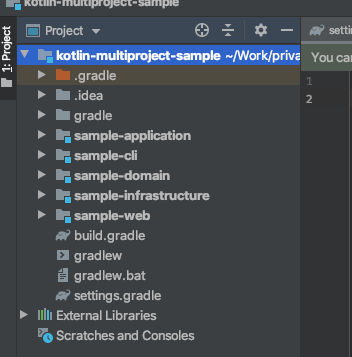
最終的に以下のようなモジュール構成にしました。
settings.gradle に追記
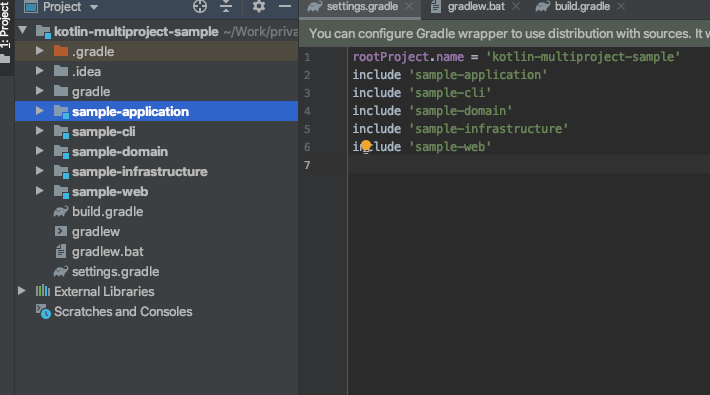
次に、settings.gradle にサブプロジェクトを追記していきます。
以下のような形で、先ほど作成した Module を subproject として追加します。
rootProject.name = 'kotlin-multiproject-sample'
include 'sample-application'
include 'sample-cli'
include 'sample-domain'
include 'sample-infrastructure'
include 'sample-web'
ディレクトリ作成
build.gradle で追加した、Module に対してディレクトリを作成するために以下を実行します。(左側の三角のボタンを押せば OK です)
Hello World
それでは、実際に Hello World をしてみます。
プロジェクト同士の依存関係のチェックも兼ねて、以下のようなコードを書いて動かしてみます。
org.example.web.Main
package org.example.web

import org.example.application.MessageService
import org.example.infrastructure.MessageRepositoryImpl

object Main {

    @JvmStatic
    fun main(args: Array<String>) {

        val service = MessageService(MessageRepositoryImpl())
        val message = service.getMessage()
        println(message)
    }
}
org.example.application.MessageService
package org.example.application

import org.example.domain.MessageRepository

class MessageService(private val repository: MessageRepository) {
    fun getMessage(): String {
        return repository.getMessage().asString()
    }
}
org.example.domain.MessageRepository
package org.example.domain

interface MessageRepository {
    fun getMessage(): Message
}
org.example.domain.Message
package org.example.domain

class Message(
    val text: String
) {
    fun asString(): String {
        return text
    }
}
org.example.infrastructure.MessageRepositoryImpl
package org.example.infrastructure

import org.example.domain.Message
import org.example.domain.MessageRepository

class MessageRepositoryImpl: MessageRepository {
    override fun getMessage(): Message {
        return Message("Hello World!!")
    }
}
これで、org.example.web.Main クラスの、main メソッドを実行すると、Hello World と実行されます。
まとめ
今回は、Kotlin を サーバーサイドで使うことを想定して、4 層のレイヤードアーキテクチャを実現するために、IntelliJ と gradle で multiproject の設定をしてみました。
今回用意したサンプルコードはいかに上げていますので、よかったら参考にしてみてください。
https://github.com/foresta/kotlin-multiproject-sample