こんにちは、 @kz_morita です。
今回は、話題の Stable Diffusion を WSL 上の Ubuntu で動かしてみました。ところどころ詰まったところがあったのでメモを残していきます。
環境について
筆者のPC環境は以下の通りです。
- Windows 10
- Ubuntu 20.04 on WSL2
- NVIDIA GeForce RTX 3060Ti (VRAM 8GB)
環境構築
Windows のバージョンを確認
後述しますが、Windows10 の 21H2 以降のバージョンじゃないと Cuda on wsl が動かないので確認します。
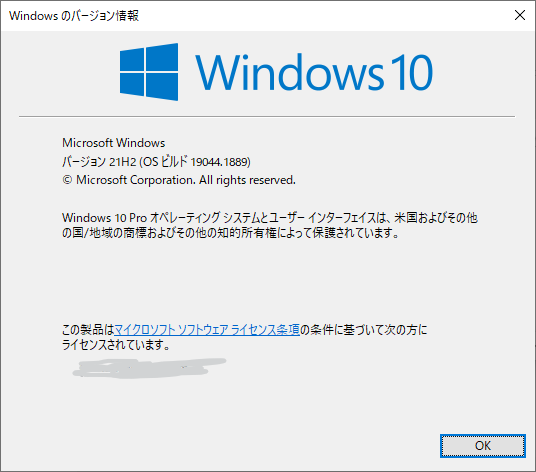
以下の公式サイトに詳細はありますが Windows 11 もしくは、Windows 10 の 21H2 のバージョンに更新します。
Cuda のインストール
Windows のバージョンを確認したら、WSL に Cuda をインストールします。
$ sudo apt-key del 7fa2af80
$ wget https://developer.download.nvidia.com/compute/cuda/repos/wsl-ubuntu/x86_64/cuda-wsl-ubuntu.pin
$ sudo mv cuda-wsl-ubuntu.pin /etc/apt/preferences.d/cuda-repository-pin-600
$ wget https://developer.download.nvidia.com/compute/cuda/11.7.0/local_installers/cuda-repo-wsl-ubuntu-11-7-local_11.7.0-1_amd64.deb
$ sudo dpkg -i cuda-repo-wsl-ubuntu-11-7-local_11.7.0-1_amd64.deb

The public CUDA GPG key does not appear to be installed.
To install the key, run this command:
sudo cp /var/cuda-repo-wsl-ubuntu-11-7-local/cuda-B81839D3-keyring.gpg /usr/share/keyrings/

$ sudo cp /var/cuda-repo-wsl-ubuntu-11-7-local/cuda-B81839D3-keyring.gpg /usr/share/keyrings/

$ sudo apt-get update
$ sudo apt-get -y install cuda
miniconda
まずは、python 周りの環境を構築します。
Miniconda をインストールします。
wget 使うので入れてない場合はインストール
sudo apt-get update
sudo apt-get install wget
Miniconda の Installer は以下のドキュメントにあります。
直接ダウンロードしてもよいですが、WSL 上にもっていったりするのが面倒なので wget でとってきます。
$ wget https://repo.anaconda.com/miniconda/Miniconda3-py39_4.12.0-Linux-x86_64.sh

# チェックサムを確認
$ sha256sum Miniconda3-py39_4.12.0-Linux-x86_64.sh
ダウンロードしたら、sha256sum コマンドで表示されたチェックサムと上記のドキュメントにある SHA256 hash が同じことを確認しておきます。
ダウンロードしたシェルを実行します。
$ sh ./Miniconda3-py39_4.12.0-Linux-x84_64.sh
途中でライセンスの確認や、インストールする場所の確認があるので設定していきます。
インストール完了すると、bashrc に初期化処理が書かれているので以下のように再読み込みします。
source ~/.bashrc
これでインストールが完了です。 このままだと shell にログインした際に自動的に conda が activate されてしまうので、自分は以下のコマンドで無効化しました。
$ conda config --set auto_activate_base false
Stable Diffusion の用意
stable diffusion の GitHub リポジトリからクローンしておきます。
ソースコードは上記なのですが、学習済みのモデルもダウンロードする必要があります。 モデルは Hugging Face というサイトで公開されているので以下をダウンロードします。
https://huggingface.co/CompVis/stable-diffusion-v-1-4-originalダウンロードには、Hugging Face への登録と git-lfs のインストールが必要なので準備します。
実行
ここまできたら、実行できるはずなので stable-diffusion の clone したディレクトリに移動し以下を実行します
$ conda create env -f environment.yml
$ conda activate ldm
$ conda run -n ldm python scripts/txt2img.py --prompt "word" --plms --ckpt path/to/sd-v1-4.ckpt --n_samples 1
--ckpt path/to/sd-v1-4.ckpt のところには、上記で取得した stable-diffusion の学習済みモデルを指定します。
上記の word のところに生成したい画像の特徴を表すワードをいれます。
自分の環境だと、VRAM が足りずに上記のコマンドは実行できませんでした。
$ python scripts/txt2img.py --prompt "catgirl" --plms --ckpt ../stable-diffusion-v-1-4-original/sd-v1-4.ckpt --n_samples 1

RuntimeError: CUDA out of memory. Tried to allocate 1024.00 MiB (GPU 0; 8.00 GiB total capacity; 6.13 GiB already allocated; 0 bytes free; 6.73 GiB reserved in total by PyTorch) If reserved memory is >> allocated memory try setting max_split_size_mb to avoid fragmentation.  See documentation for Memory Management and PYTORCH_CUDA_ALLOC_CONF
とりあえず、生成する画像のサイズを小さくしたら実行することはできました。
# 256x256 のサイズに指定
$ python scripts/txt2img.py --prompt "catgirl" --W 256 --H 256--plms --ckpt ../stable-diffusion-v-1-4-original/sd-v1-4.ckpt --n_samples 1
VRAM は 8GB とかだと足りないケースが多いので、以下のメモリ節約版の stable-diffusion を使うのがよさそうです。
まとめ
今回は、WSL上で stable-diffusion を動かすためにいろいろと環境構築をして遊んでみました。
prompt に入れるワードは難しいのですが、以下のサイトで実際に生成された画像とそれを生成した prompt のワードが閲覧できるので好きな画像を見つけてワードを楽しめると思います。
参考リンク
いろいろなサイトを参考にさせていただいたのでリンク張っておきます。
- https://github.com/CompVis/stable-diffusion
- https://github.com/basujindal/stable-diffusion
- https://docs.microsoft.com/ja-jp/windows/ai/directml/gpu-cuda-in-wsl
- https://docs.conda.io/en/latest/miniconda.html#linux-installers
- https://oritone.hatenablog.com/entry/2022/08/24/120328
- https://touch-sp.hatenablog.com/entry/2022/08/23/222916
- https://zenn.dev/ettsu/articles/6a1e68cea8864b
- https://zenn.dev/koyoarai_/articles/02f3ed864c6127bb2049
- https://kontext.tech/article/1064/install-miniconda-and-anaconda-on-wsl-2-or-linux
- https://minerva.mamansoft.net/Notes/📝Stable+Diffusionを実行するとCUDA+out+of+memoryエラー